The Giant Nutcrackers are ALL THE RAGE this Christmas Season!
As soon as I saw folks buying and painting these guys, I KNEW I had to have one (or a few)… HOWEVER, ya’ll, I cannot bring myself to spend hundreds of dollars on something and then paint over it all. I just CANNOT do it!
Then, I got an idea… There HAS to be a way to DIY these guys. So I took to Pinterest to see if anyone had already thought of this, and because I am NOT a genius, several people had tried various ways of putting some together with buckets, concrete tubes, etc.
*Light Bulb*
I literally have all of these things just hanging out around the house! LITERALLY.
So, I raided my scrap pile and, if you follow along on Instagram, Sir Fredrick II was born! And I truly mean that he was born. He was a labor of love… He seriously turned out WAY better than I had ever imagined. And was fairly easy!
Everyone was SO encouraging on my post (Thank ya’ll! You are my people!) and everyone wanted to know how to make their OWN DIY Nutcracker.
HERE IT IS FOLKS!! The Tutorial you didn’t even know you needed!!
Let’s make you a DIY Giant Nutcracker!
Now, let me start by saying that I purchased all of these items at my local Lowe’s. Like me in the beginning, you may not even need to go buy all of these things! Doesn’t everyone have a gajillion 5 gallon buckets sitting around?! However, IF you need to start from scratch, here is your Materials List:
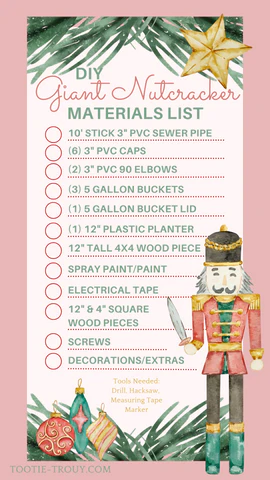
I spent about $70 on materials. This does NOT include paint, decorations, etc. because if you were re-doing one of the pre-made ones, you would still need those things. This is just to make the actual Nutcracker. I believe the most affordable ready-made guy I could find is $129, so right off the bat, you are saving $50! (Even more if you have some of these materials on hand, like I did!)
Now that you have all of your materials and tools, LET’S BUILD A NUTCRACKER!
STEP 1: Cut your PVC into pieces. I used my little hacksaw and cut (4) 20″ pieces and (2) 6″ pieces. There is enough in your one big stick of PVC to make all these cuts. These will be the legs, arms and feet of your Nutcracker.
Step 2: We are going to start at his Feet. Your materials list called for a 12″x12″ piece of wood. It doesn’t have to be this exact size; just needs to be big enough for his feet and to act as a base for him to stand on. Go ahead and connect the (2) 90 degree PVC elbows to your (2) 6″ pieces of cut PVC. Then drill pilot holes through the outside: one at the “heel” and one further down the “sole” of his foot. Simply drill your screw through the PVC and then back it back out. See the image below. This will make it easier to drill through the inside and attach to the board.
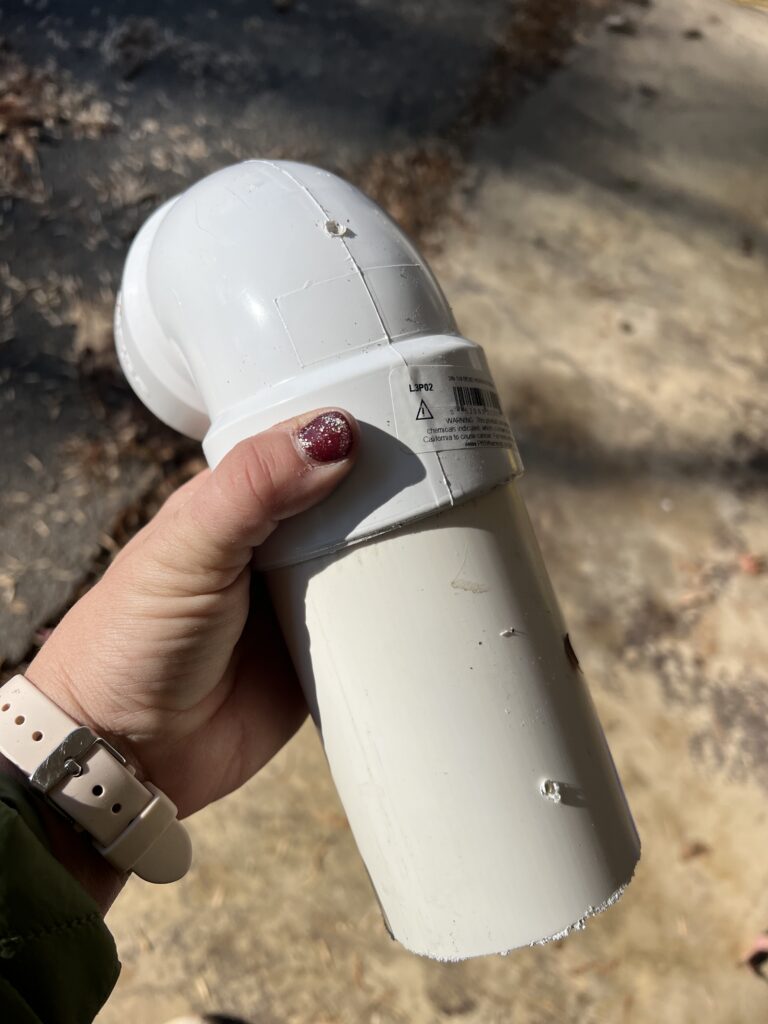
Then, you are going to place his “foot” on your wooden base and attach with screws through the inside. Make sure you attach the feet at 6″ on center. This will matter when you do the tops of his legs. You will likely need an extender on your drill. Don’t over tighten the one on the “sole” as you will still need to put the cap on the end once they are attached. The length of your screws will depend on how thick your wooden platform is. You don’t want the screws coming out the bottom. Place (2) of the PVC caps on the ends.
Congratulations! Your Nutcracker has Feet!
Step 3: Moving on up our Nucracker here, we are going to move onto his legs. Take the 5 gallon bucket lid, (2) PVC Caps, and the small piece of wood. We need to attach the caps to the TOP of the lid. The bucket will be placed upside down, so the lip of the lid needs to be facing UP. The small piece of wood is to ensure that everything grabs tight when you screw it together.
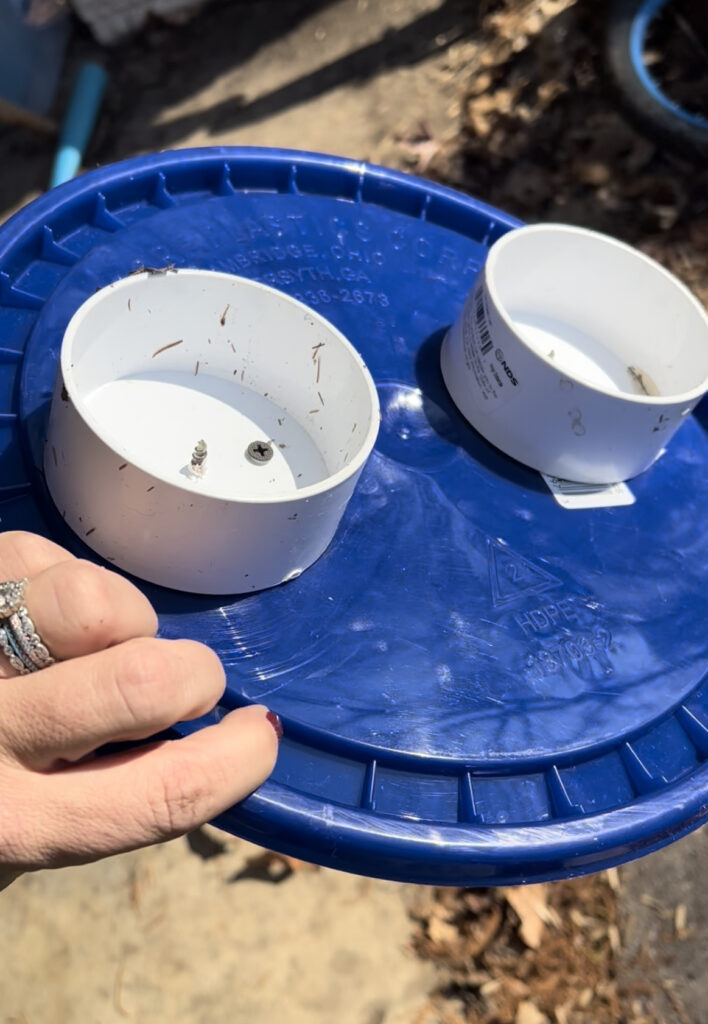
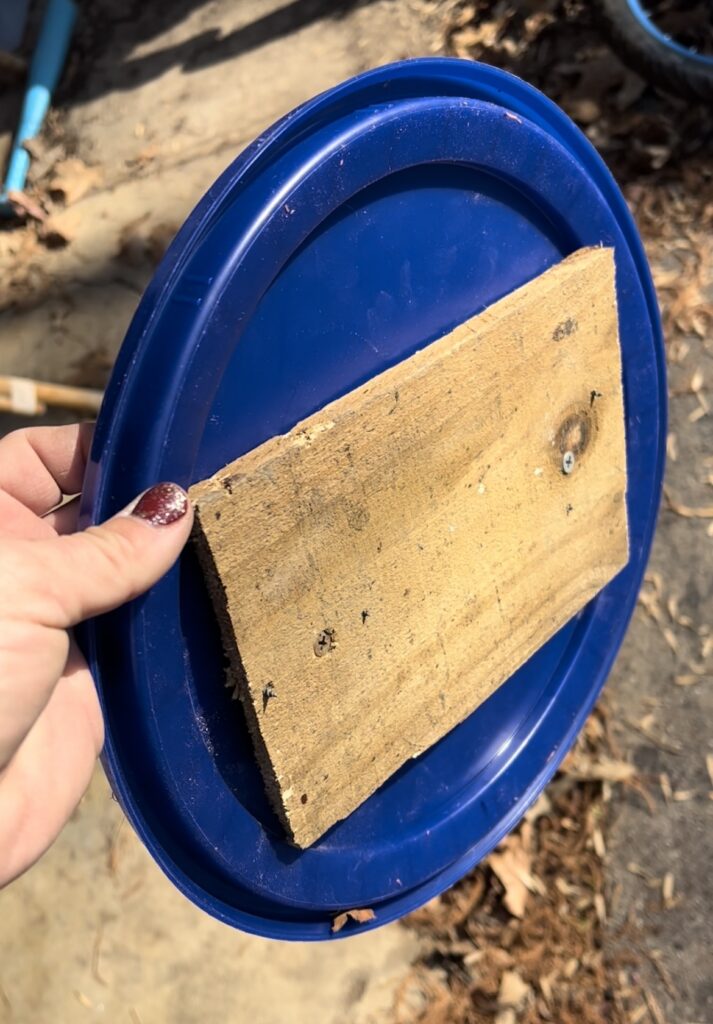
Take (2) 20″ PVC pieces and connect the feet base and the lid piece, and *VOILA* Lt. Dan has NEW LEGS!!
The final thing for Step 3 is to attach the first bucket, upside down, securing it to it’s lid. To remove the handle off the bucket, you just have to manhandle it. I have not found an easier way. Once you are able to pop out one side of the handle, the other one comes out pretty easily because you can rotate it.
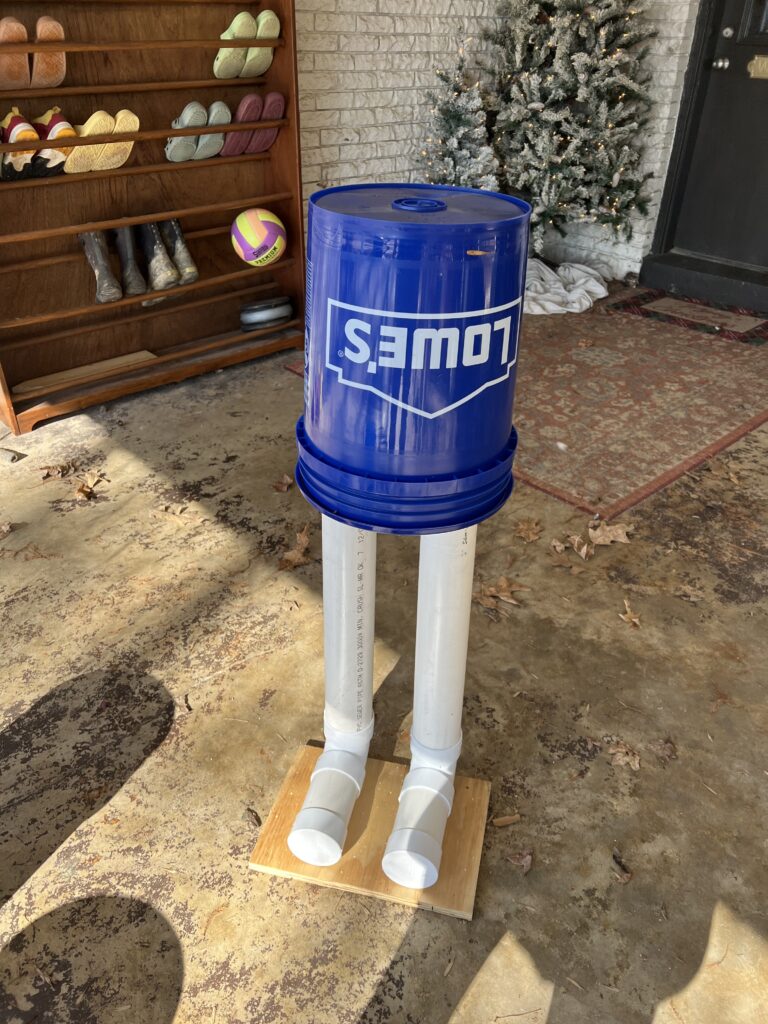
Step 4: Now we are going to build his body and arms. Once you complete the step above, get another 5 gallon bucket, remove the handles and place it end to end with the base you have already created. Attaching this is pretty simple. Get you something to stand on, especially if you are vertically challenged like me, and reach down in the top bucket, screwing the two buckets together. They grab and are pretty secure to one another. I used 4-5 screws to do this.
Now for his arms. I tried some other methods, but this is the one I like best. Grab the last (2) PVC Caps and we are going to attach them to the top bucket right below the rim. You can simply drill straight through the cap into the bucket. However, the screw NEEDS to be placed in the bend of the cap. If you put it on the flat part, the PVC arm cannot fit snug. See the photo below. And ignore all the extra holes. That was me figuring out what does NOT work…
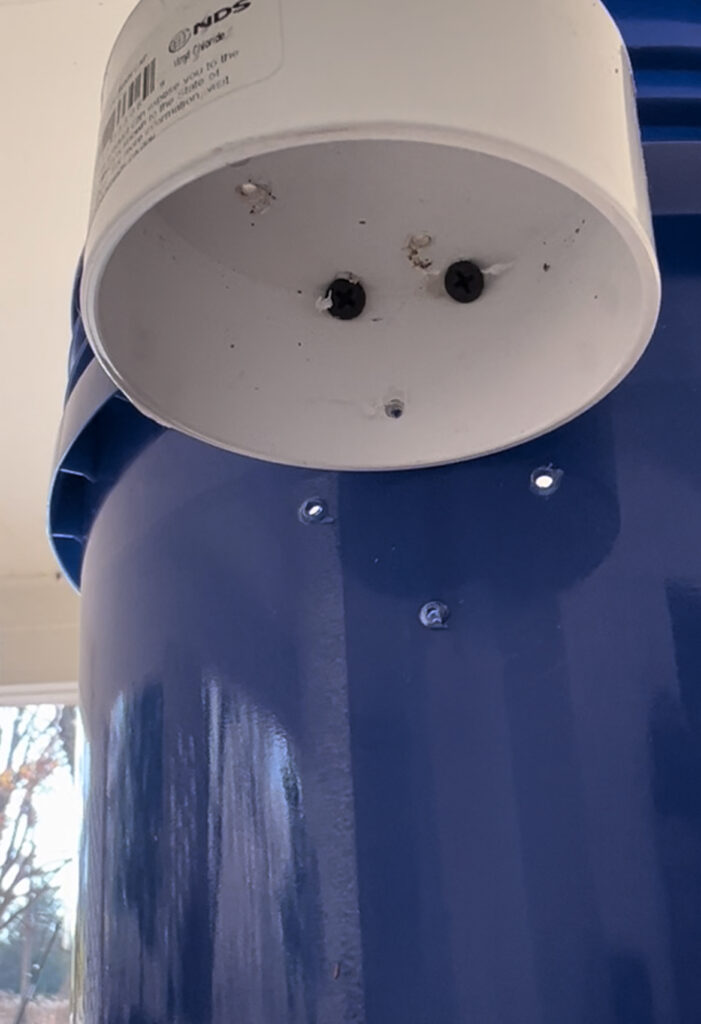
Next, grab the last (2) 20″PVC pieces and connect them to the caps. I also screwed the arms to the bucket body to make them more secure, right inside the bottom of the tube where they hang by his sides.
Step 5: YOU ARE ALMOST THERE! He needs a HEAD!
This is probably the trickiest part, because I think it looks best when the hat overlaps his head a bit. You are going to take your Flower Pot and the 12″ piece of 4×4 and connect them. Simply screw through the bottom of the pot and into the center of the 4×4, and then add a couple more screws for support.
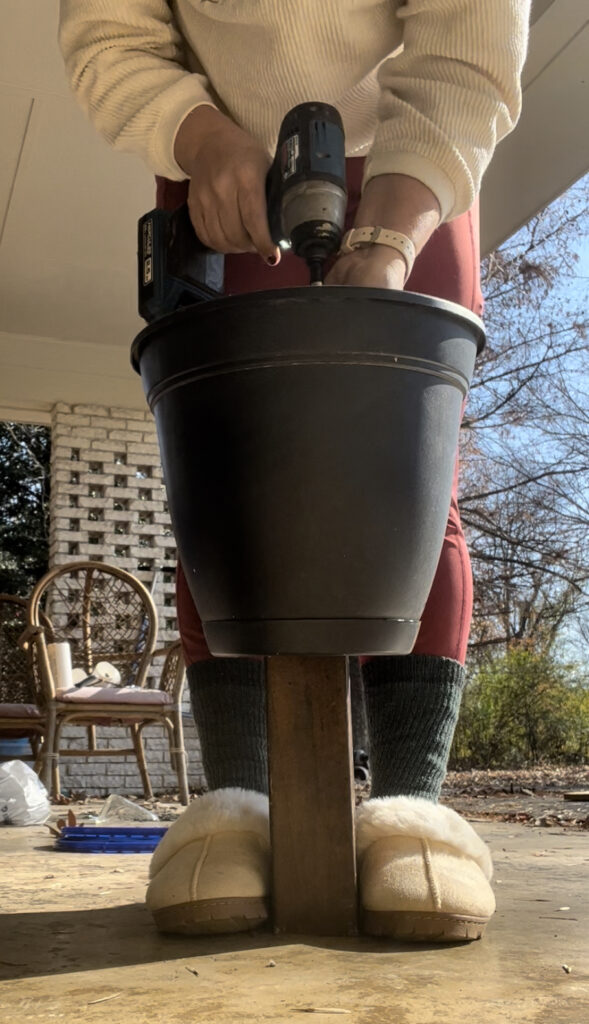
THEN, sit your final bucket down onto the 4×4 and screw through the center of the bucket into the center of the 4×4 and add a couple more screws there for support as well.
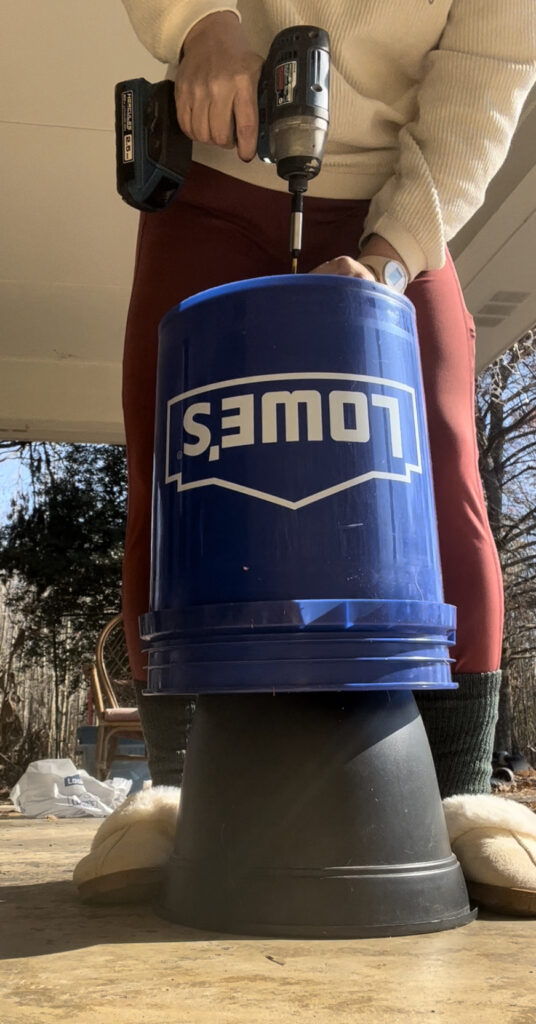
FINALLY, let’s attach his head!!
We are going to line up your flowerpot with the top of the second bucket. They are EXACTLY the same size. Now, grab your black electrical tape and go to work! I start by taping evenly along the seam and then keep going around until I feel like he is secure.
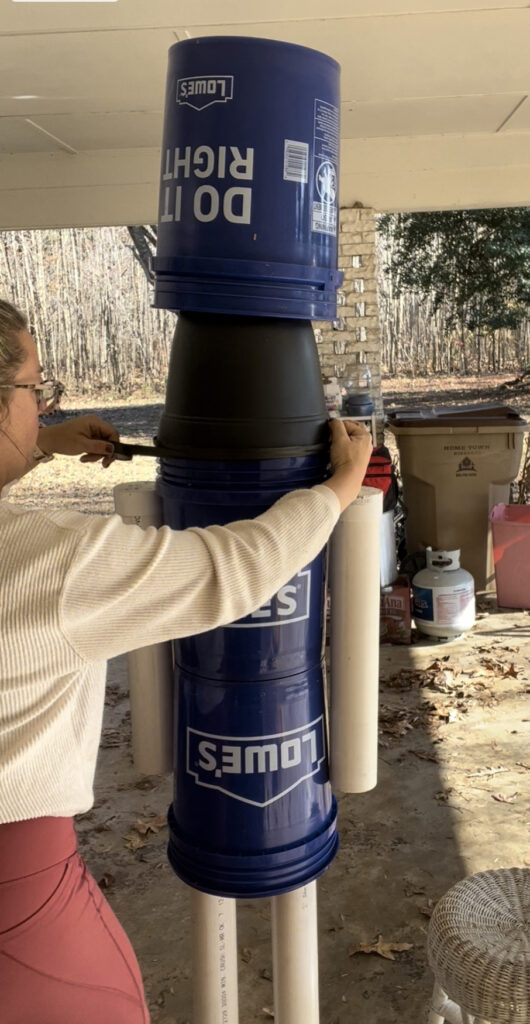
Holy MOLY!! You have a DIY Giant Nutcracker!!!!!
Well at least, you have his body. Step 6 is allllllll about making him handsome!
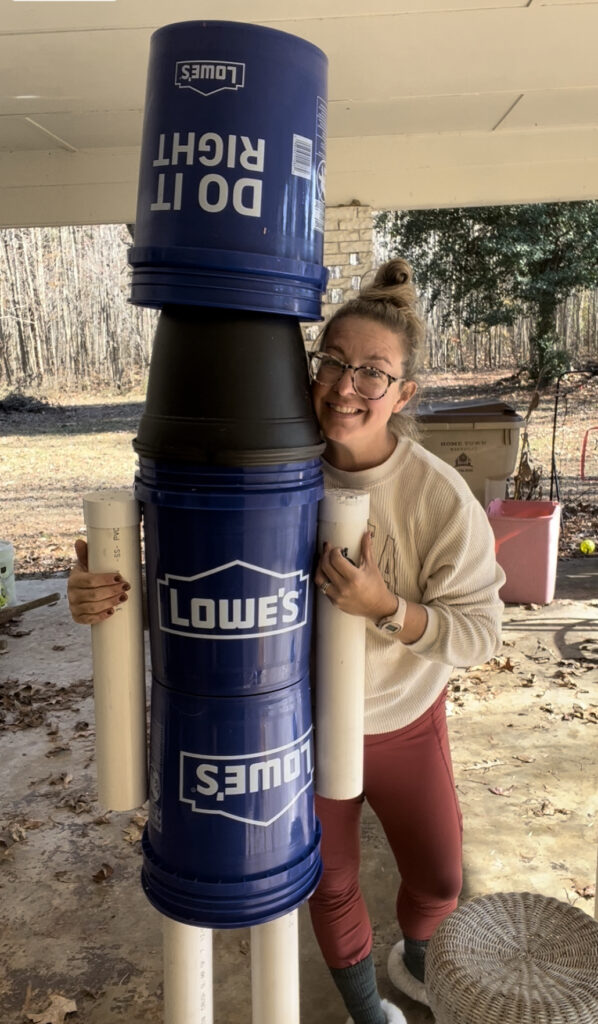
Step 6: The Beautification Process
This step is COMPLETELY up to you. Use your imagination!! The only thing I would really recommend though, is hitting him with some spray paint first because it will make any other paint adhere MUCH better.
I originally planned to make this one Candy Cane themed, but he evolved into a Woodland Nutcracker. I loved the taupe color I sprayed him with first, so I rolled with it. I grabbed some pinecones and some greenery, kept his colors very earthy and gave him a wooden staf. I used faux fur and leather to cover seams and to give him more interest by using different materials.
I love to hit them with glitter spray at the end because it just gives it the perfect finishing touch.
For his face, I simply find and image online and freehand it, but if you aren’t comfortable with that, and have a Cricut, there are many Etsy shops that have files for Nutcracker Faces.
AND in case you guys forgot Sir Fredrick II, here he is! The Original!!!
I HOPE you have enjoyed my DIY Giant Nutcracker Tutorial!! I have loved sharing these guys with ya’ll!


Leave a Reply